Overview
To enable integration with existing Spark environments, ModelOp Center provides a Spark runtime micro service. This component is in charge of submitting Spark Jobs into a pre-defined Spark cluster, monitoring their statuses and updating them at model-manage accordingly.
Spark runtime service should be able to run outside the K8s fleet, likely to be running as an Edge Node.
It also supports auto enrollment at Model-Manage and Eureka and OAuth2 interaction.
Spark-Runtime-Service core components:
ModelOpJobMonitor for ModelBatchJobs:
Monitor jobs repository for CREATED ModelBatchJobs with SparkRuntime engines.
Launch SparkSubmit jobs using the SparkRuntime engine data.
Update Jobs status from CREATED to Waiting.
Update Job appending SparkApplication Job ID.
Monitor job repository for WAITING & RUNNING ModelBatchJobs with SparkRuntime engine.
Extract SparkApplicationJob ID and use it to query Job Status at SparkCluster.
Update Job status and Job repository accordingly with SparkCluster Job updates.
PySparkPreprocessor:
Component in charge of translating a ModelBatchJob into a
PySparkJobManifest.Reads all the ExternalFileAssets intputs & outputs leaving them available for the PySparkJob as lists during runtime.
From ModelBatchJobs:
Extract and write StoredModel primary source code as tmp file to be executed inside SparkSubmit.
SparkSubmitService:
Build SparkSubmit execution out of
PySparkJobManifestRead/Recover SparkJob output, from different sources.
Clean tmp file once SparkSubmit finished of failed.
Support Kerberos authentication.
ApplicationListener:
Auto enroll as Spark engine at model-manage.
Support secured OAuth2 to talk with Model-manage and Eureka.
Health Check (goal to leverage existing SpringCloud library actuator functionality):
Maintain keep alive/health status with Eureka.
SageMaker preparation
Within SageMaker AWS
Model
Navigate to your Models in AWS and select your target model.
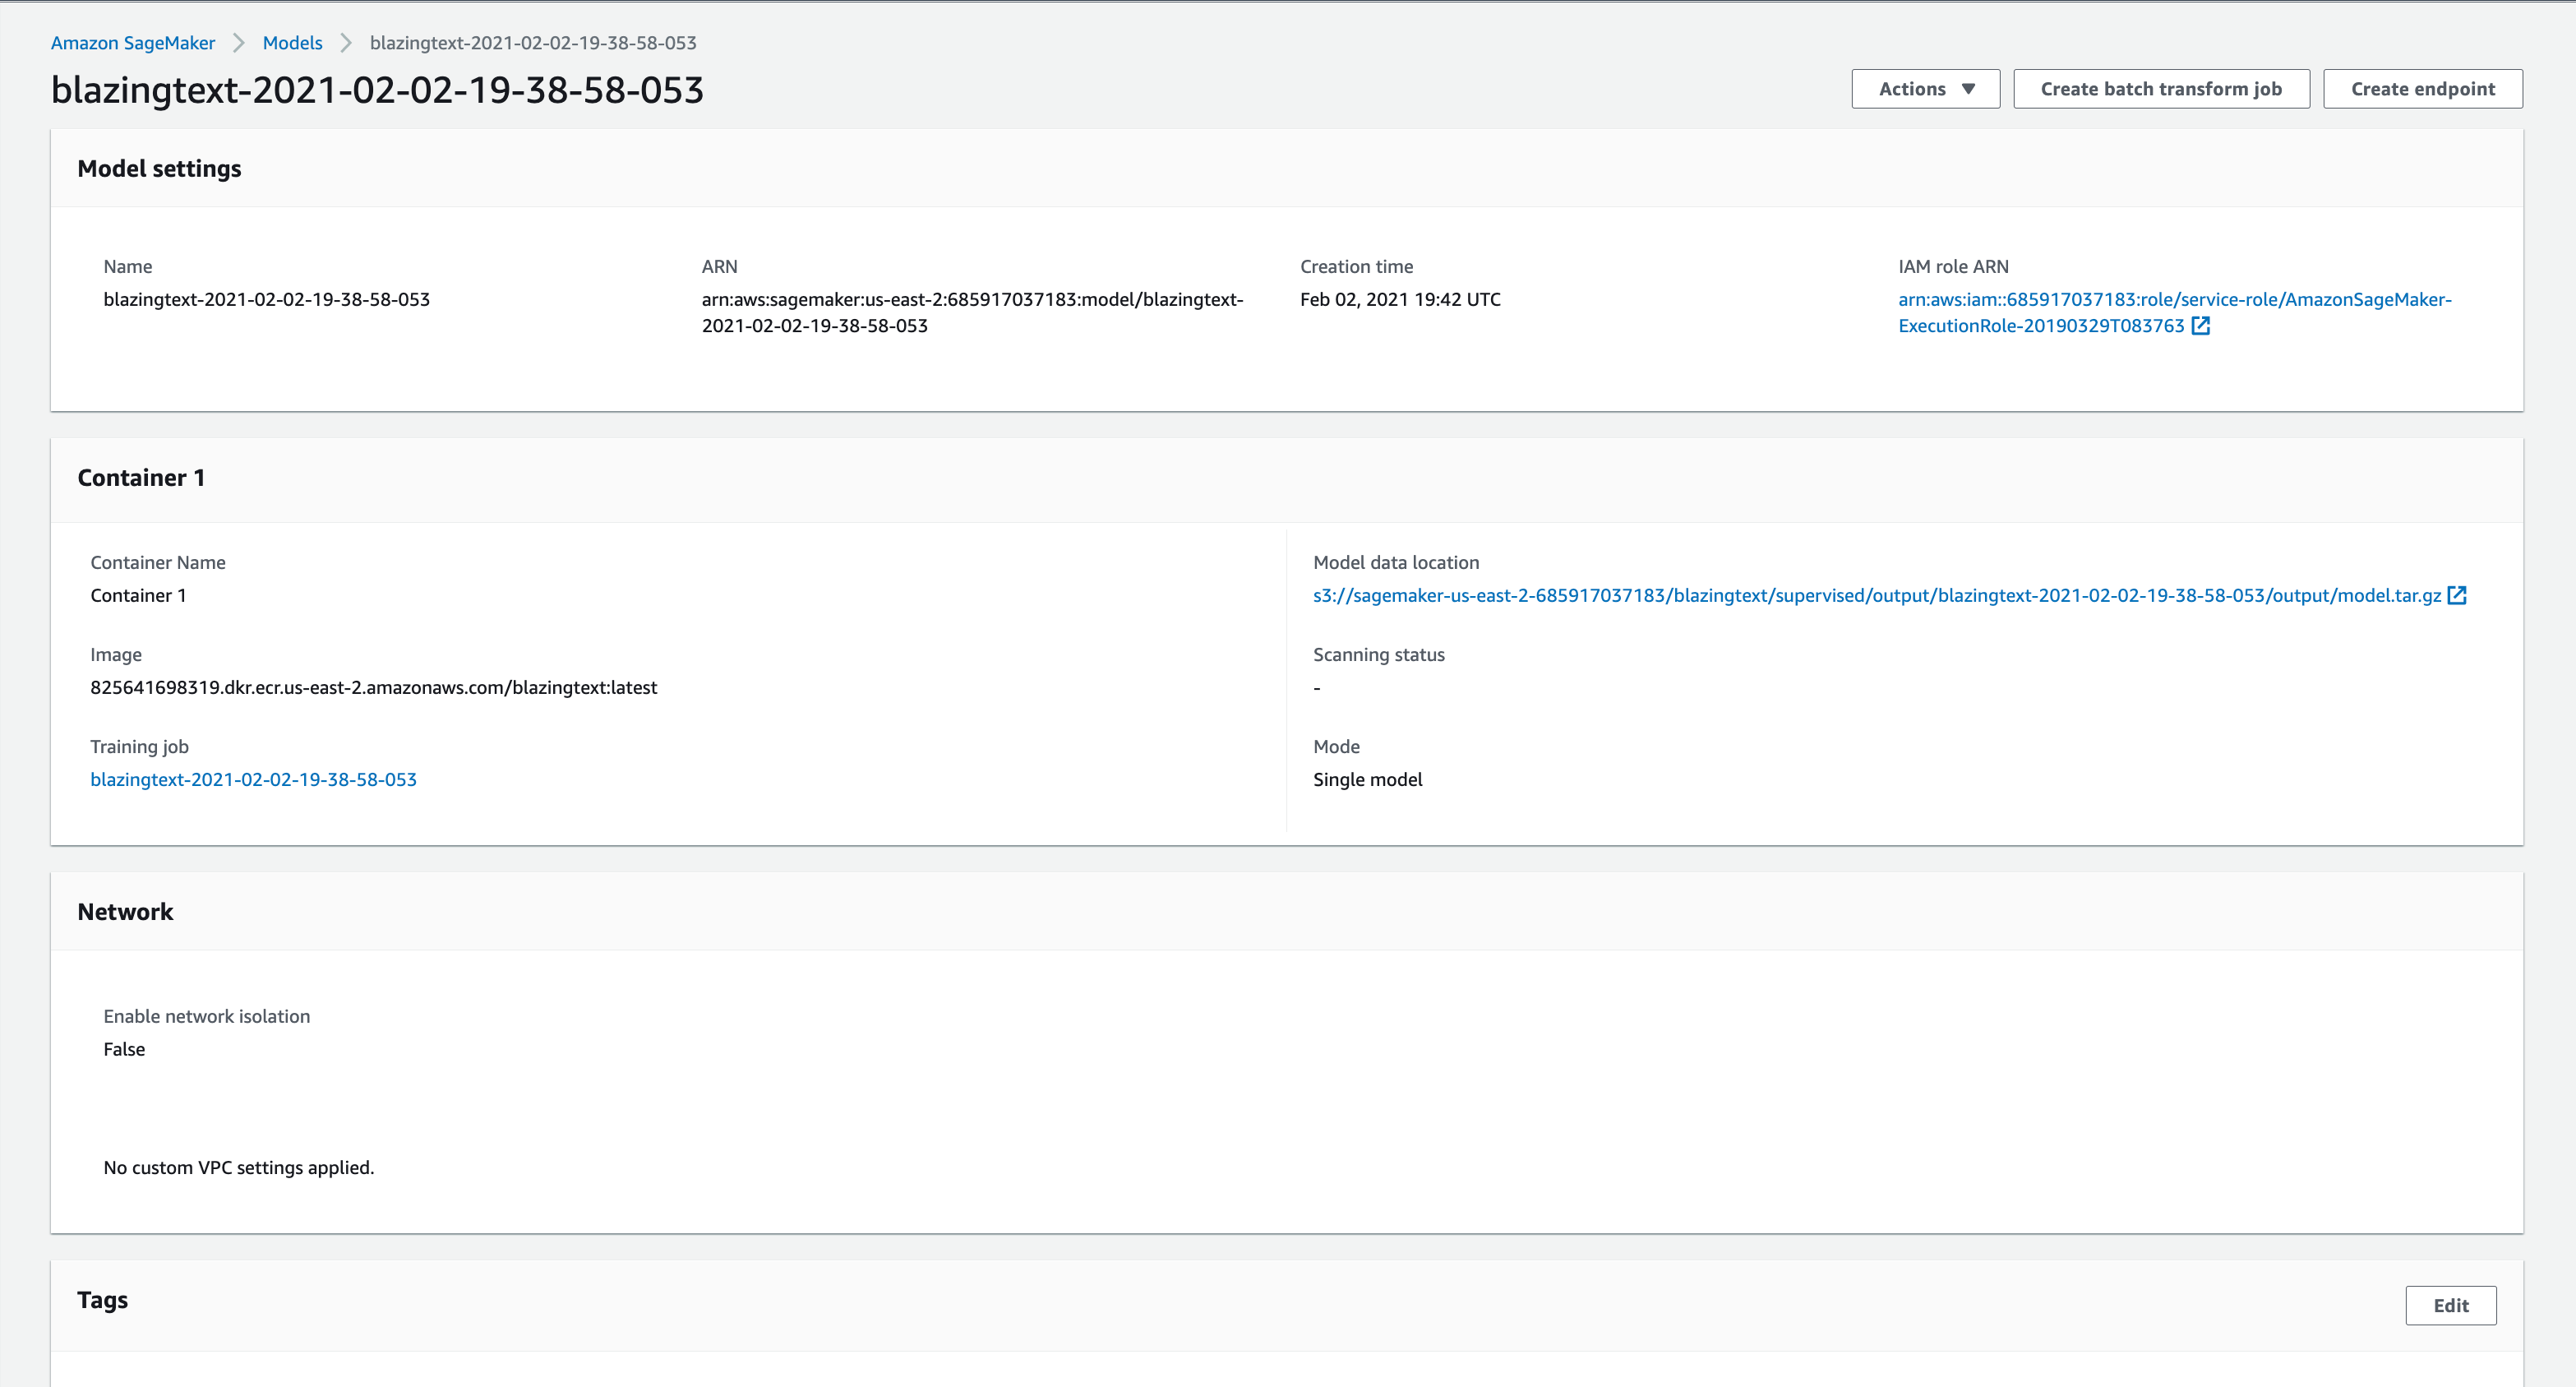
As you can see, the model has certain settings, such as:
Name, ARN, Creation Time
A container in which a training job was run
Certain network properties and tags
You will be using your target model’s name and your AWS credentials to upload to ModelOp center.
Endpoint configuration / Endpoints
Endpoint configuration
Our endpoint configuration is equivalent to a Snapshot/Deployable model in ModelOp Center, when creating an endpoint you must associate it with your target model. You can also use the relevant tags for your instance. Below is an example of an endpoint configuration.
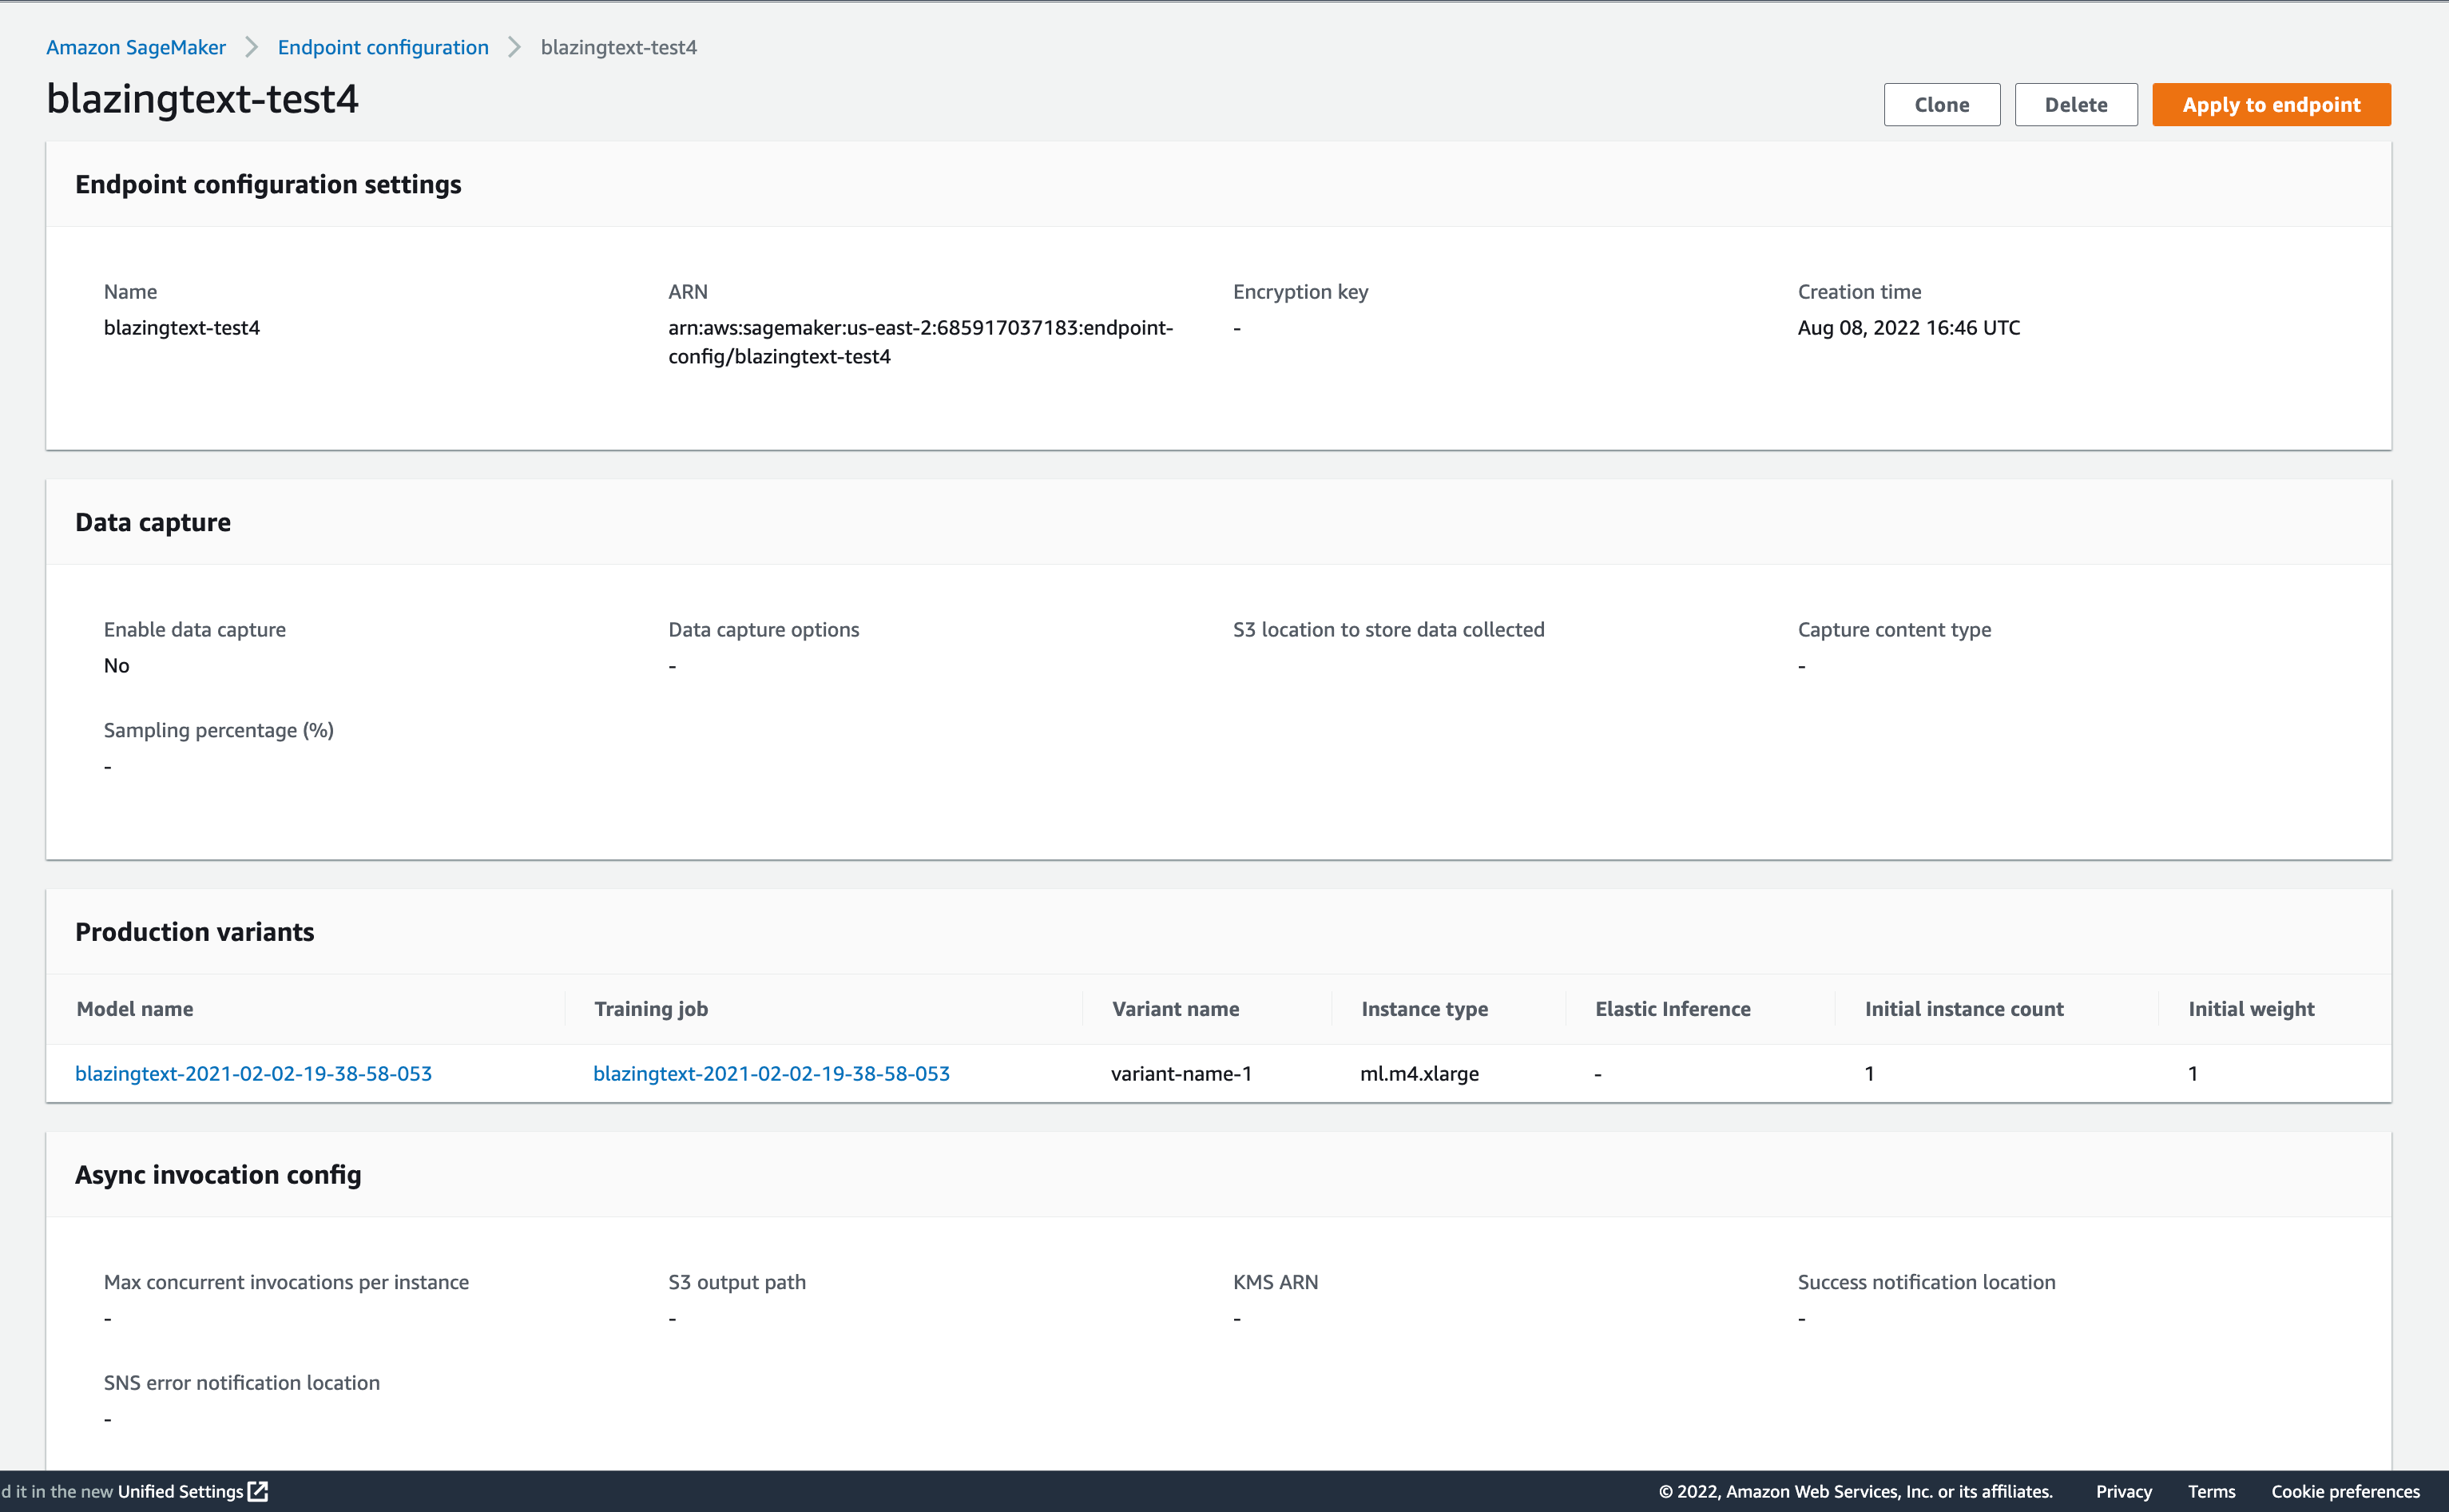
Endpoint configurations include:
Name, ARN, Creation Time
Production variants such as a model
An Endpoint configuration could have 1 or more models associated with it.
Tags
Endpoint
Endpoints are the equivalent of a Deployed Model running on a run time in ModelOp Center, on the endpoint configuration there is a section present that is used to create this endpoint as you can see in the above image in the top right corner.
Endpoints include:
Name, ARN, Creation Time, Status
Endpoint Configuration Settings from your Endpoint Configuration
Monitor
Configuration
Here we must have the SageMaker Service running and configure the credentials below.
Depending on what authentication type you use there will be different credentials, we support BASIC and ASSUME_ROLE_WITH_WEB_IDENTITY types.
For BASIC authentication type-
| Code Block |
|---|
sagemaker-credentials:
  storedCredentials:
    - group:
      authenticationType: BASIC
      accessKeyId: xxxxxxxxxxxxxxx
      secretAccessKey: xxxxxxxxxxxxxxxxxxxxxxxxxx
region: us-east-2 |
accessKeyId and secretAccessKey:
These act as a username and password for AWS SageMaker so you will need both to authenticate. These will be unique to you.
region:
This is where your instance is located, you will be able to find this in your AWS account webpage or on the header bar on the AWS webpage.
For ASSUME_ROLE_WITH_WEB_IDENTITY authentication type-
| Code Block |
|---|
sagemaker-credentials:
    eksServiceAccountCredentials:
   			- path:
    	      roleArn: <AWS-ROLE-ARN>
webIdentityTokenFile: <AWS-Injected-file> |
roleArn:
This is the Role Amazon Resource Name, find in AWS console in your desired resource
webIdentityTokenFile:
Here you provide a file containing your token in order to authenticate you.
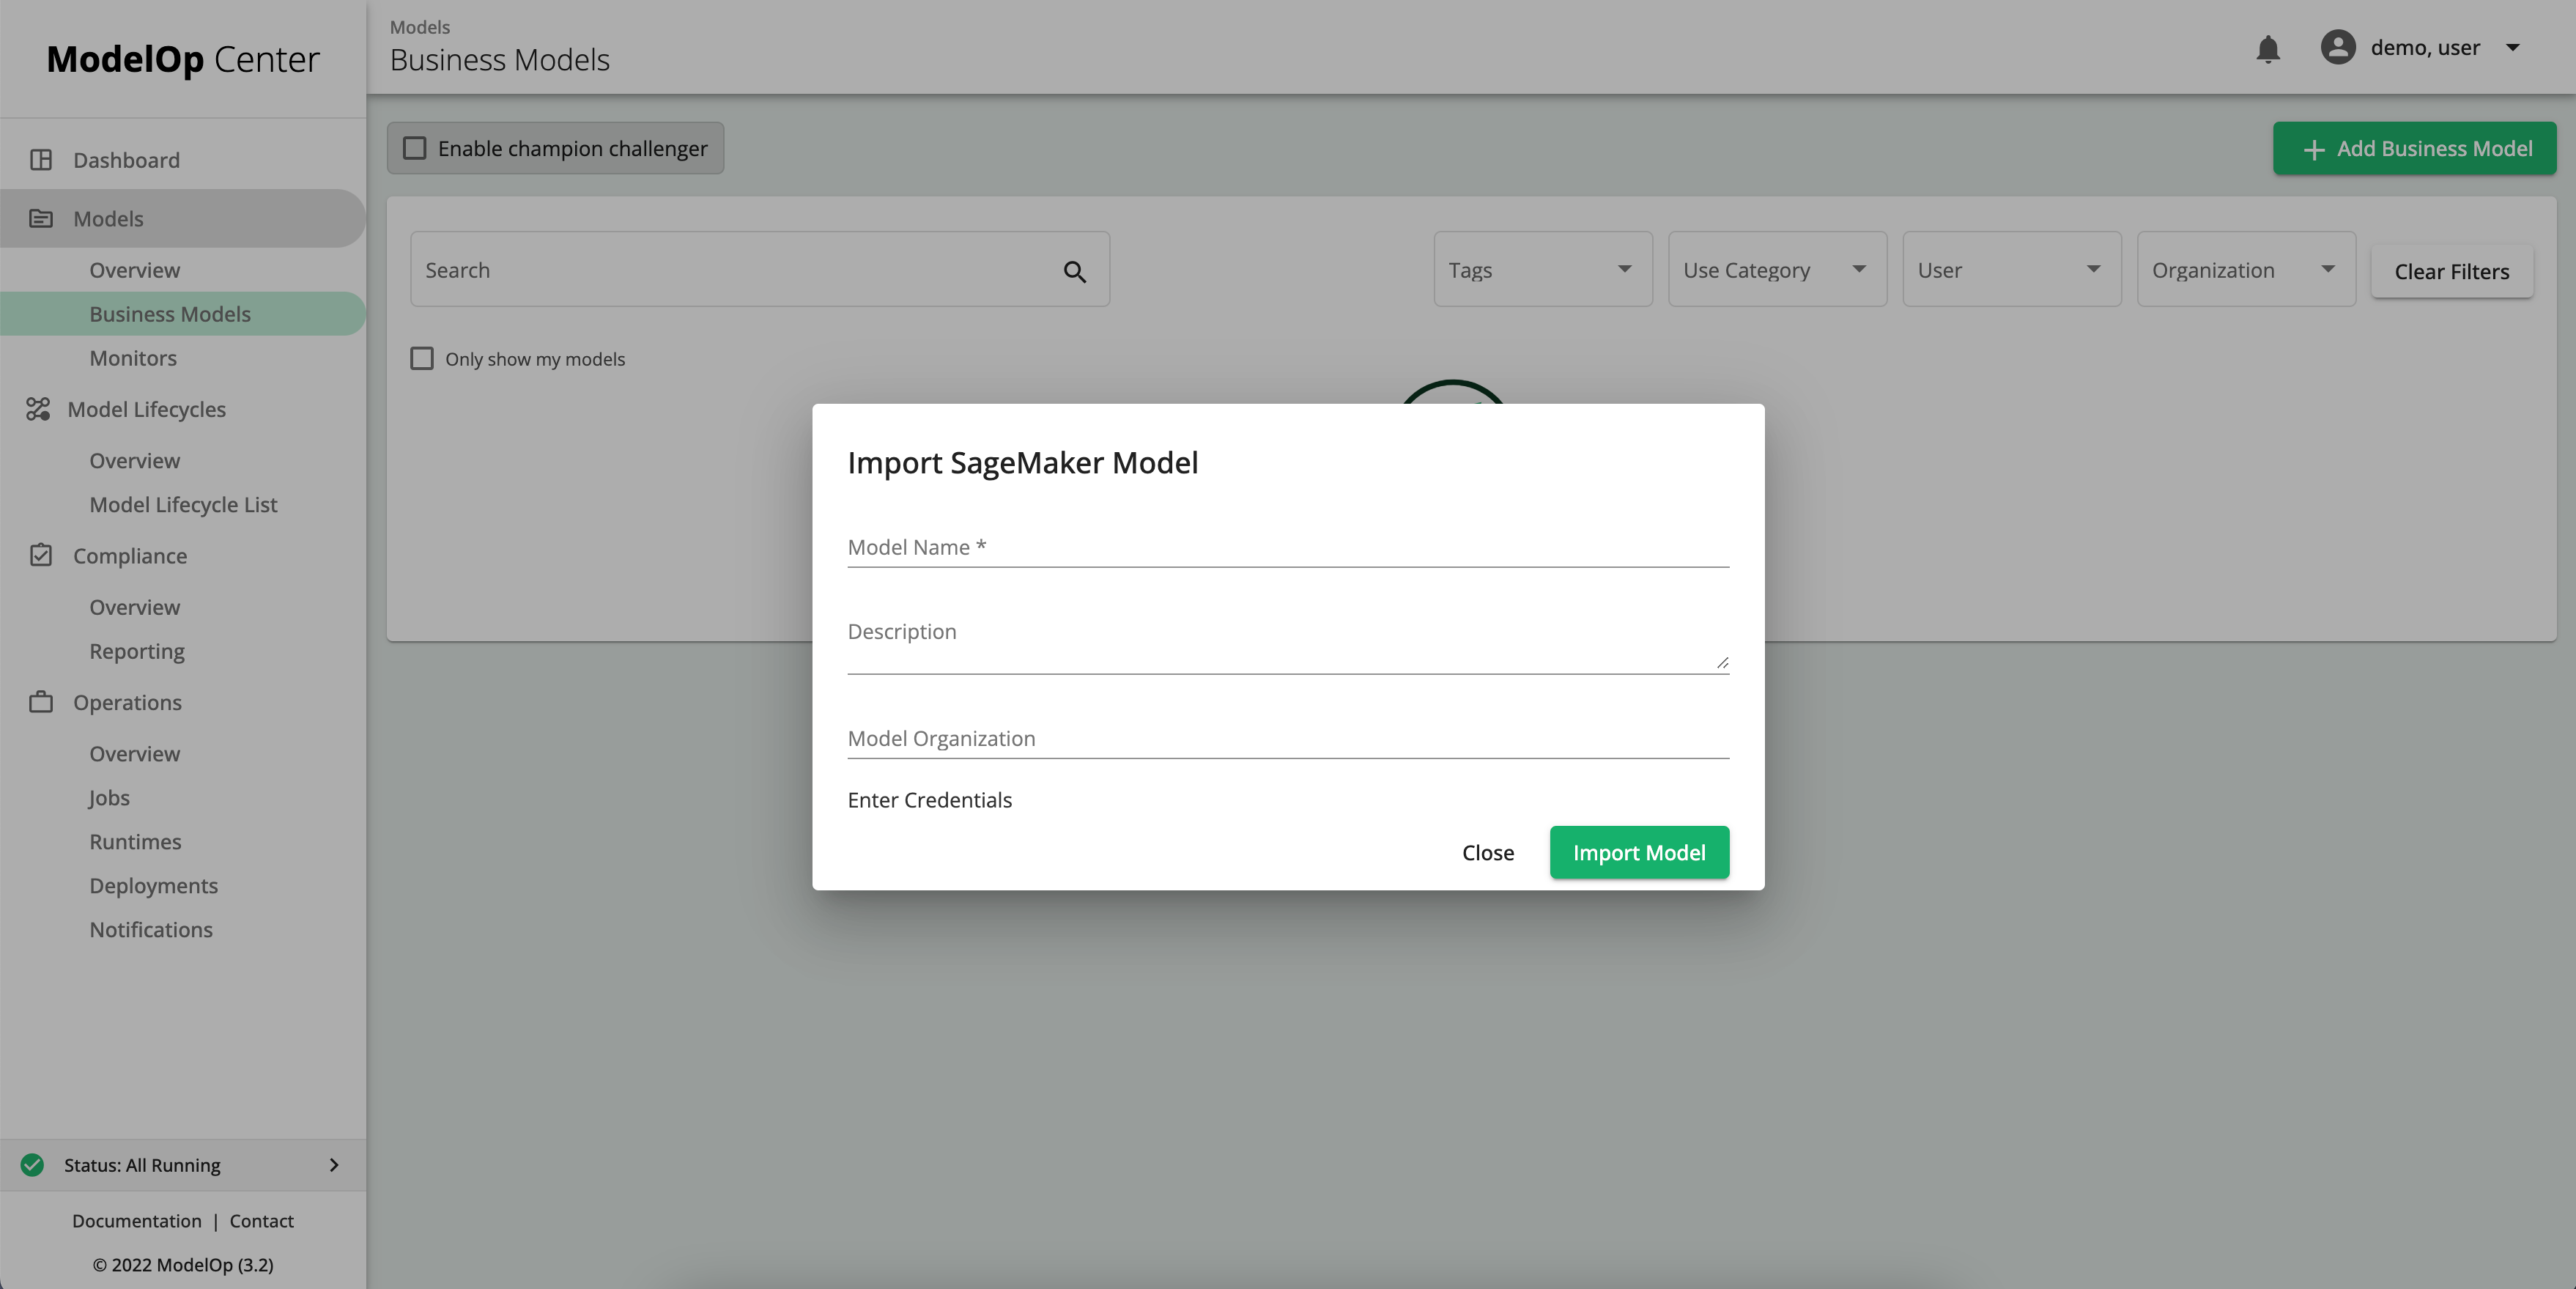
Import onto ModelOp UI
We must now register the SageMaker model in ModelOp Center. Navigate to the Business Models tab and select “Add Business Model” in the top right corner. Here we will need to provide the model name, it is recommended that the credentials be configured within the environment as seen in the Integration section above. If not you can chose Enter Credentials and enter the region, access key and secret key at this step.
When a SageMaker model is registered with ModelOp Center, it is represented and handled as a Stored Model.
The same model specific information we saw on AWS console, we have available in ModelOp Center, including the model name, ARN, tags, creation time, and links to training jobs.
Within ModelOp Center, an Endpoint Configuration is represented as a snapshot. Each snapshot includes its name, tags, creation time, endpoint configuration specific fields, model details, tests and custom metadata. If there is no endpoint configuration for your model one will be created by default.
Next, we have the Endpoint which is represented as a SageMaker Runtime with a snapshot deployed. The engine details show the most relevant information that we saw on AWS console.
All previously ran jobs will be able to be viewed and new jobs can be created within the ModelOp Center.
Finally, when we imported the model, all of the TRANSFORM and TRAINING jobs from AWS, for this particular model, were imported as well.
All of the entities that we looked at were first created in AWS and then represented in ModelOp Center.
Import Elements
Importing a model will import the following elements:
Model Information on the Registry
Related Training Jobs
Related Batch Transform Jobs
Related Endpoint configurations
Related Endpoints
Job import will include:
Job execution dates, execution time, and other available basic info
Input data s3 url
Output data s3 url
Link to the SageMaker console for the job
Endpoint Config Import will include:
Basic details of the endpoint config.
Link to the SageMaker console for the endpoint config
Endpoint Import will include:
Basic details of the endpoint.
Link to the SageMaker console for the endpoint
MLCs
SageMaker deploy model
In this MLC you have an option to run a transform job and/or deploy a SageMaker endpoint. First you must trigger the MLC by:
Importing a SageMaker model with existing Endpoint Configurations.
OR
Creating an Endpoint Configuration in SageMaker on an already imported model.
Once the MLC is triggered it will follow this flow:
Verifying required assets (documentation, schema, training data, test result comparator, test data asset).
If Test Data Asset available, Run a test SageMaker transform job.
Create Jira approval ticket
If approved, a SageMaker Endpoint will be created, which translates to a new Runtime.
In these steps we see that a transform job is ran if Test Data Asset is present, once the job has completed successfully it is sent to be deployed. Alternatively, if you do not wish to run a transform job do not include Test Data in your model and simply approve the ticket requesting deployment and the model will be sent on the path to deploy. When a SageMaker model is deployed this creates a SageMaker Endpoint.
There are cases that this MLC fails, these are:
The MLC will trigger for every new Snapshot, but will quickly exit if the model is not a SageMaker model.
If the SageMaker Transform job is run and failed, it will create a Jira ticket notification, and won't try to deploy to an Endpoint.